Evening · Advanced
Cut Crease
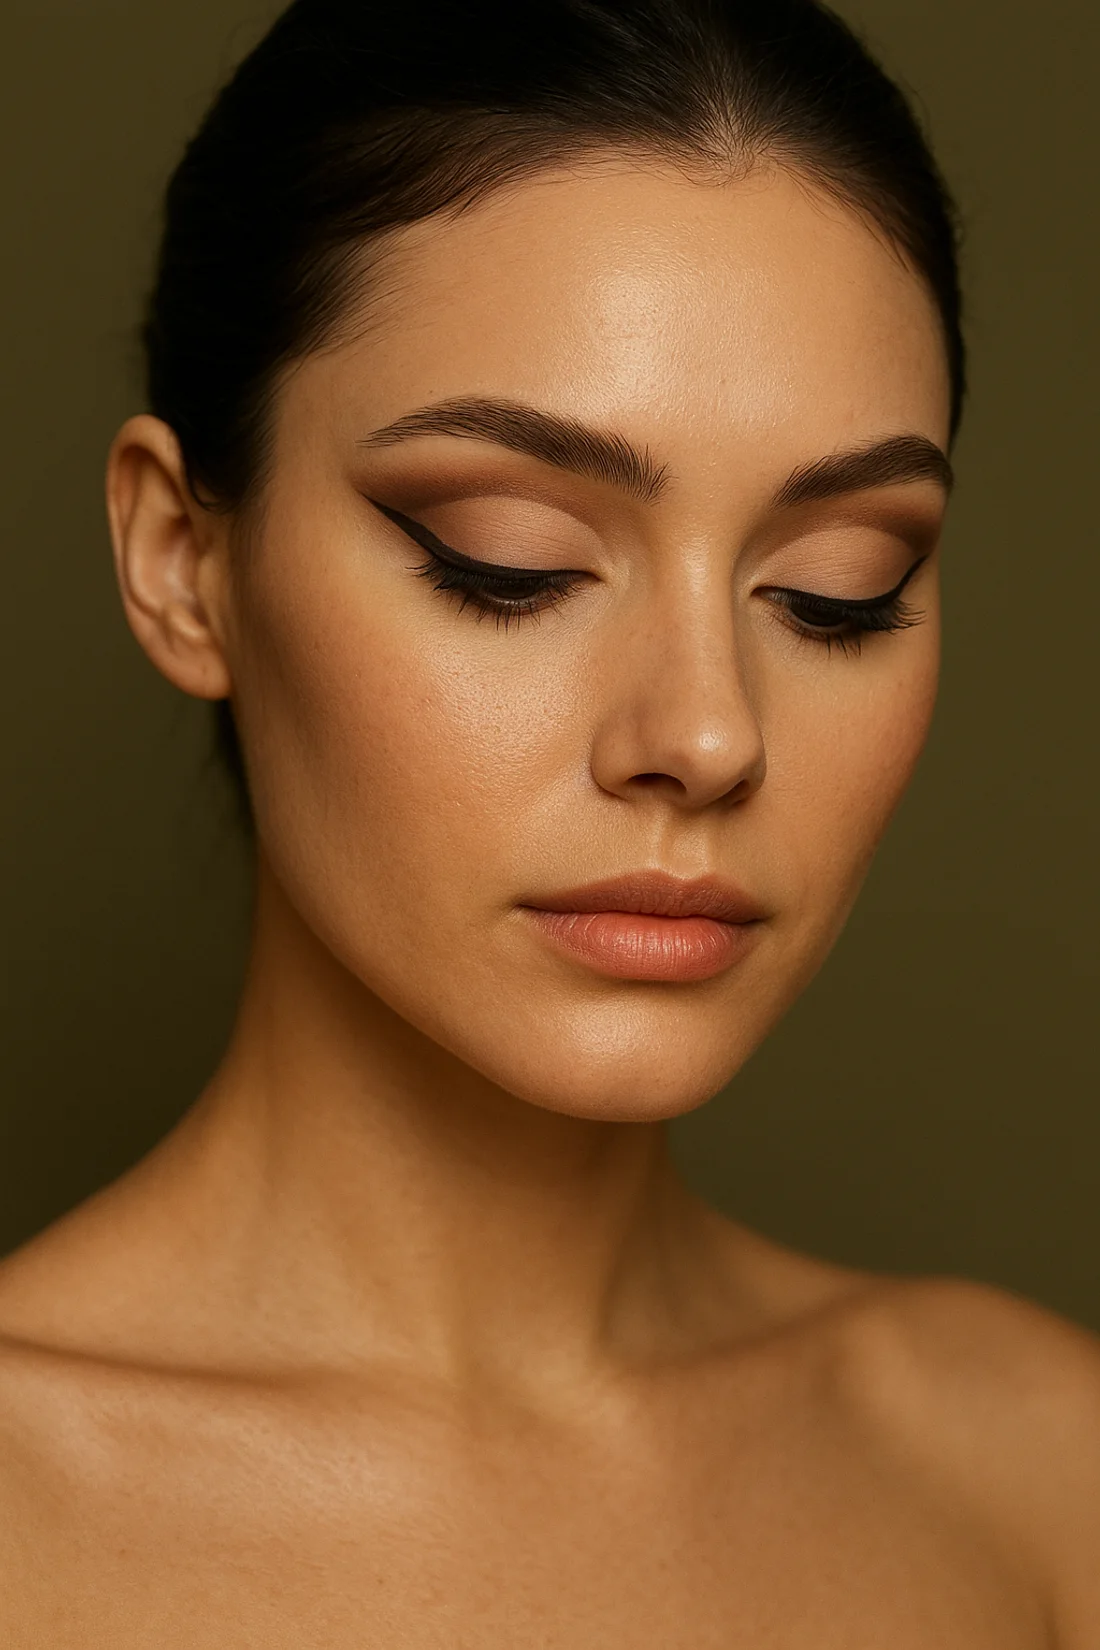
This is the hardest tutorial on LookSteps, and it is worth saying so before you start. A cut crease is not a blended eye: you build the colour first, then draw a hard lid line over it with cream concealer and set that line with powder. It needs a steady hand, a flat brush and about half an hour, and the first few attempts usually come out uneven between the two eyes because no two eyes are shaped the same. Give it an evening when nothing depends on it, work the shape out with both eyes open before you carve, and expect the carve itself to take two passes.
Your skin tone
Skin tones sit on a spectrum, not in three boxes — if you are between two, read both, because undertone matters as much as depth.
Shade matching & colour correcting
Find your undertone
A cut crease puts two shades next to each other with a hard line between them, so the two have to belong to the same family or the eye reads as two halves. Work your undertone out in daylight by a window: blue or purple veins lean cool, green or olive lean warm, a mix means neutral — but treat that as a rough guide, because vein colour depends on how near the veins sit to the surface and on your own depth, and plenty of people sit between two answers. The check that actually decides it here is comparison on the lid: hold a warm brown and a cool plum side by side along your lash line with the eye open and see which one looks like shadow on your skin. Deeper skin often reads warmer than it swatches, so when the two are close, take the warm one.
Match your base
The thing you are matching in this look is the concealer you carve with, and it should match your lid, not your jaw — lids are often a shade deeper or redder than the rest of the face, and a carve matched to the cheek shows as a pale band across the eye. Swipe three candidate concealers in short stripes on the lid itself, in daylight, and look at them with the eye open at arm's length. Then check the powder you will set it with against the concealer, because the set shade is what people actually see. On lighter lids a concealer one step lighter than the lid is the classic carve, but only if it is set immediately or it turns grey; on medium and deeper lids, matching the lid is what keeps the line sharp rather than chalky. Concealers oxidise, so give them ten minutes before you commit, and expect to buy a shade that looks slightly deep in the tube.
Colour correcting by tone
- Light
Green only on genuine surface redness and thin enough to vanish — under a carved lid a heavy green layer shows as a grey-green patch below the cut line. Peach under the eye for blue-violet shadow, then conceal in your own depth rather than lighter, or the pale ring under the eye fights the pale lid.
- Medium
Peach or salmon under the eye, and a skin-tone cream shadow over any lid that is deeper than the cheek before you start building. Keep the corrector off the carved area itself: the carve is supposed to be a clean, even colour, and a corrector underneath it shows through.
- Deep
Orange, or red-orange for the deepest shadow, under the eye and around the mouth, then conceal in your own depth with a warmer, brighter undertone. Do not lighten the lid to make the carve stand out — on deeper skin that is what turns the whole eye chalky, and the contrast has to come from the crease shade instead.
Why deeper skin goes grey — and what to use instead
A cut crease goes grey or chalky on deeper skin for one reason: something pale has been laid across the whole lid rather than at the line. A concealer lighter than the lid, a translucent setting powder, or a pearl shimmer all scatter light and sit on the surface as dust. Use a concealer matched to your lid, set it with a matte shadow in the same tone rather than a white powder, and press — never sweep — so you do not lift the base underneath. On the crease side, build in a saturated plum, bronze or emerald rather than a grey-brown, because a neutral brown beside a bright carved lid looks dusty by comparison. If the finished eye looks ashy at the outer corner, it is the setting powder or the shimmer, not the carve.
The kit
What you need
Base
- Eyeshadow primer
- Finely milled setting powder, tinted to your skin
- Cream concealer to carve with — matched to your lid, or one step lighter only if your lid is lighter
- Under-eye concealer in your own depth, plus a corrector if you need one
- A little concealer in your own depth for clean-up
Eyes
- Matte eyeshadow in a mid-brown, plum or bronze for the crease and outer half
- A contrasting matte shadow for the carved lid, clearly different from the crease shade
- Optional: a finely milled shimmer in gold, bronze or copper
- Gel or liquid liner
- Kohl pencil for tightlining
- Mascara, and optional half lashes
Lips
- Nude or rosy-brown matte lipstick in a depth that shows on your lips
Tools
- Flat shader brush — this is the carve brush
- Small dense blending brush
- Fluffy blending brush
- Small detail brush
- Cotton buds and micellar water
- A mirror you can look straight into
Before you start: New to a product? Patch-test it on your inner forearm 24 hours before you wear it on your face, and check expiry dates on anything that has been open a while. Stop using anything that stings, itches or breaks you out.
Products & brands
Suggestions, not tested endorsements. These are widely available lines that suit this step; formulas and shade ranges change, so check the version you are buying. No prices and no links — brands are listed by tier so you can choose by budget.
Eyeshadow primer
Drugstore
- e.l.f. Lock It Down Eyeshadow Primer
Mid-range
- MAC Prep + Prime 24-Hour Extend Eye Base
- Rare Beauty Always an Optimist Weightless Eye Primer
Cream concealer to carve with
Drugstore
- e.l.f. 16-Hour Camo Full Coverage Concealer
Mid-range
- Laura Mercier Secret Camouflage
- Clarins Instant Concealer
Premium
- Estée Lauder Double Wear Stay in Place Concealer
Match the carve concealer to your own lid rather than going lighter — no separate carve product was verified, so these are the verified cream concealers.
Tinted setting powder
Drugstore
- e.l.f. Halo Glow Loose Setting Powder
Mid-range
- MAC Mineralize Skinfinish Natural
Premium
- Hourglass Veil Translucent Setting Powder
Matte shadows — crease, outer corner and the carved lid
Drugstore
- e.l.f. Bite-Size Mini Eyeshadow Palette — the palette family only — single shades go in and out of stock
Mid-range
- NARS Total Seduction Eyeshadow Stick — deep neutral shades
Premium
- Pat McGrath Mothership palettes — I: Subliminal, VII: Divine Rose, X: Moonlit Seduction
Finely milled shimmer
Drugstore
- e.l.f. Liquid Metallic Eyeshadow — gold and champagne shades
Mid-range
- Laura Mercier Caviar Stick Eye Color Shimmer
Premium
- Pat McGrath Mothership VII: Divine Rose
Gel or liquid liner
Drugstore
- Maybelline Hyper Precise Liquid Eyeliner
Mid-range
- Stila Stay All Day Waterproof Liquid Eye Liner
- Rare Beauty Perfect Strokes Matte Liquid Liner
Premium
- MAC Liquidlast 24-Hour Waterproof Eyeliner
- Estée Lauder Little Black Liner
- Guerlain Mad Eyes Liquid Eyeliner
Kohl for tightlining
Drugstore
- e.l.f. Smoky Kohl Eyeliner Pencil
Mid-range
- MAC Eye Kohl
Premium
- Sisley Ligne Noire Eyeliner
Mascara
Drugstore
- e.l.f. Lash 'N Roll Curling & Lifting Mascara
- Collection Colour Lash Mascara
Mid-range
- Clinique High Impact Mascara
Premium
- Guerlain Mad Eyes Mascara
Nude or rosy-brown lipstick
Drugstore
- Collection Soft Matte Lipstick
Mid-range
- MAC MACximal Silky Matte Lipstick
- NARS Powermatte High Intensity Lipstick
Premium
- Estée Lauder Pure Color Matte Lipstick
Tools — flat shader brush, blending brushes, cotton buds
No specific product named here — a damp makeup sponge, a small angled brush or a spoolie from any brand works. No brush, sponge or spoolie could be verified at drugstore or mid-range, so none is named.
No product here is paid for or linked to, and nothing on this page earns a commission. Where a slot has no verified product we say so rather than guess.
Follow along
Step by step
Use Previous and Next, or the arrow keys.
Prime, then set the lid dry
Smooth primer over the lid, press a light dusting of finely milled powder over it, and let it sit for a minute before any colour goes on.
Why it works
The cut is drawn with cream concealer, and cream on a creamy, unset base slides. A dry, primed surface is the difference between a line that stays where you put it and one that creases within the hour.
Skin tone notes
- Light
Lighter lids crease visibly, so primer plus a light dusting of tinted powder is not optional here — concealer drawn onto an unset base gathers in the fold before you have finished the second eye.
- Medium
Use a skin-tinted primer and set it lightly; too much powder makes the concealer skip across the lid instead of laying down an even line.
- Deep
A cream shadow or tinted primer in your own depth, set with a finely milled tinted powder, gives the carve something to hold. White primer under this look shows as a pale band exactly where the cut line sits.
Next